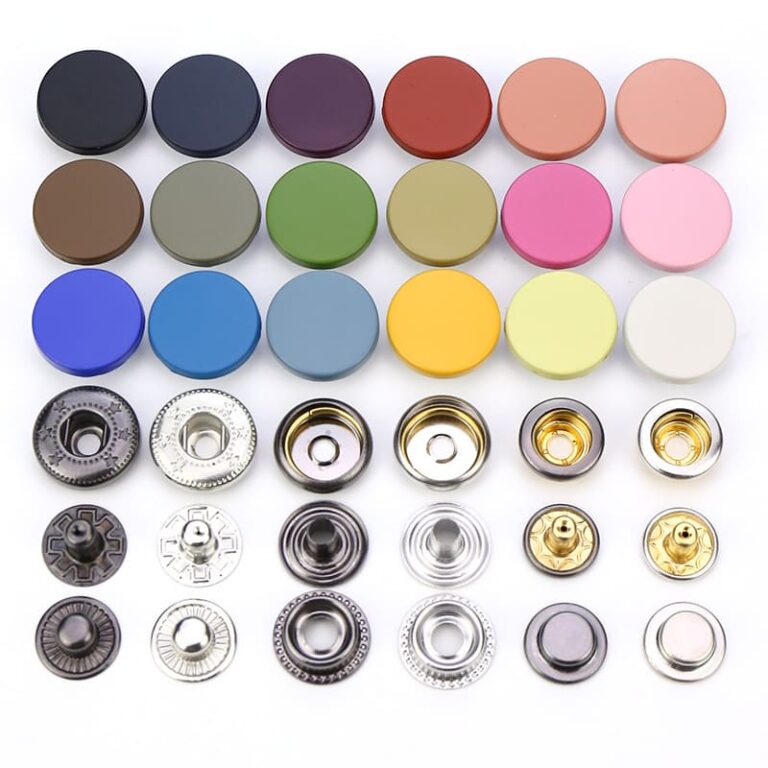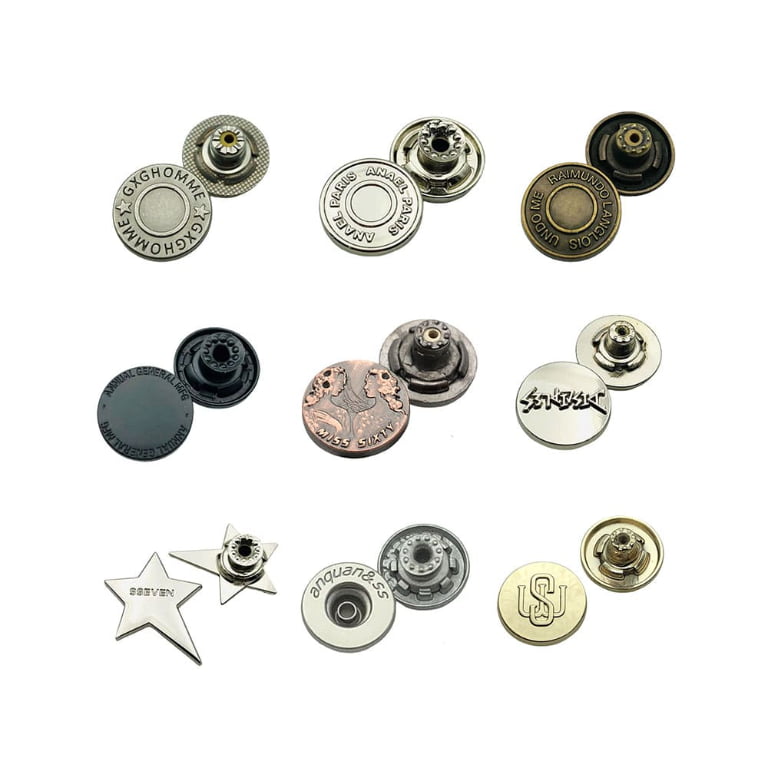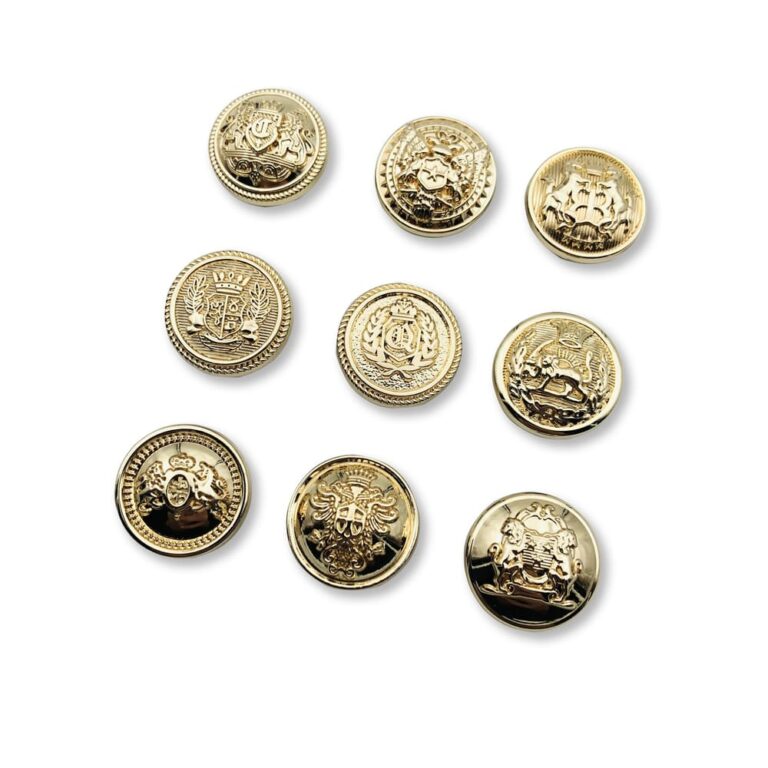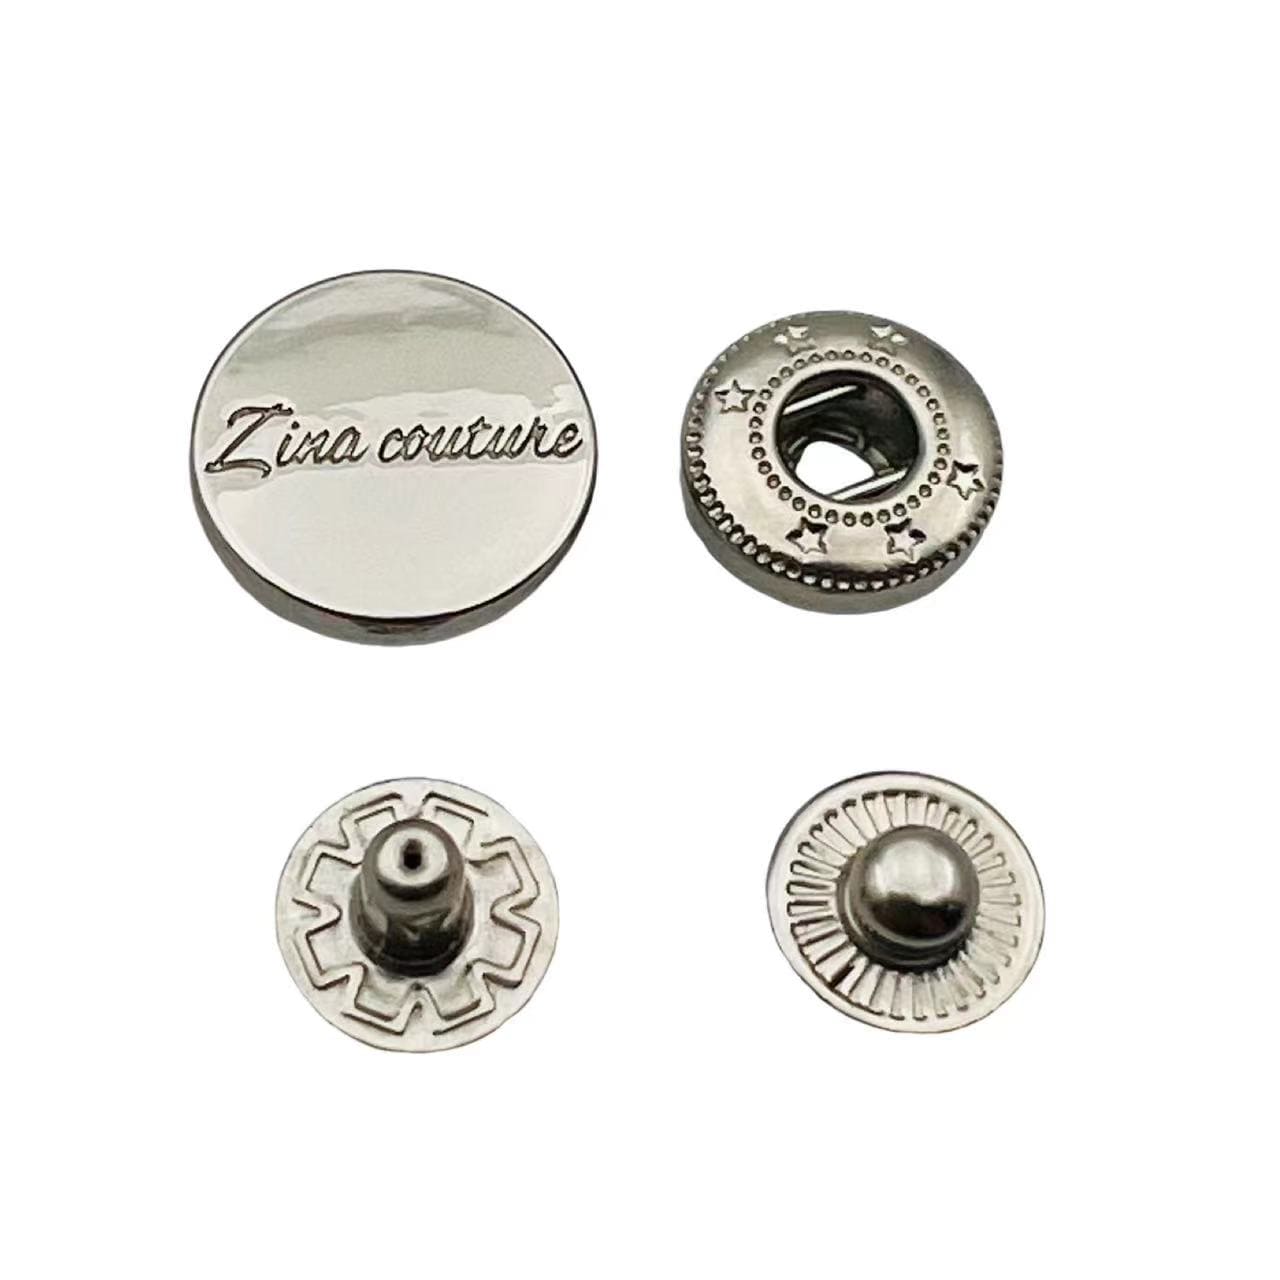
To attach a button without sewing, buyers first need to know the button type, garment material, and required fixing strength. A loose or poorly matched button can damage fabric, slow production, and create quality complaints. The practical solution is to use snap systems, rivet-style buttons, shank buttons with caps, or machine-installed buttons with matching die sets.
You can attach a button without sewing by using a mechanical fastening method1, such as snap buttons, jeans buttons, rivet buttons, prong buttons, or machine-set shank buttons. These buttons are usually fixed with a hand press, pneumatic machine, automatic attaching machine, and matched die sets2 instead of thread.
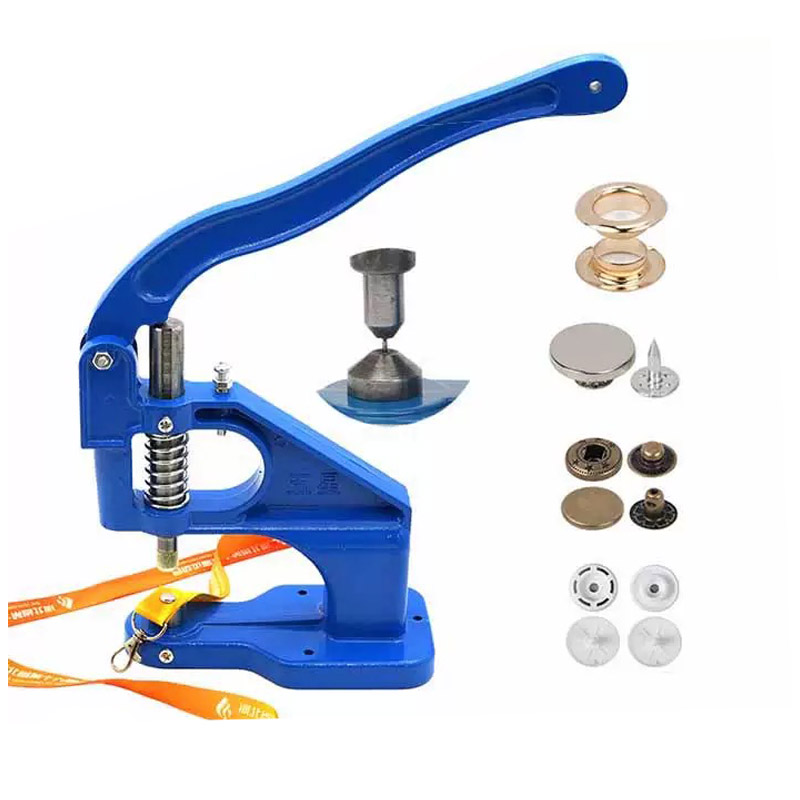
This method is common in garment factories, denim production, bag manufacturing, and fashion accessory development3. However, the best choice depends on material thickness, button structure, pull strength, surface finish, and production volume. I have seen many projects succeed or fail based on these small details.
Many people think every button needs thread. That idea creates problems when a design needs speed, strength, or a cleaner back side. If the wrong fastening method is chosen, the button may rotate, fall off, deform the fabric, or fail a buyer’s inspection.
To attach a button without sewing means fixing the button to fabric, leather, denim, canvas, or synthetic material through pressure, piercing, clamping, riveting, or snap engagement4. Instead of needle and thread, the process uses button parts, die sets, and installation equipment to create a mechanical lock.
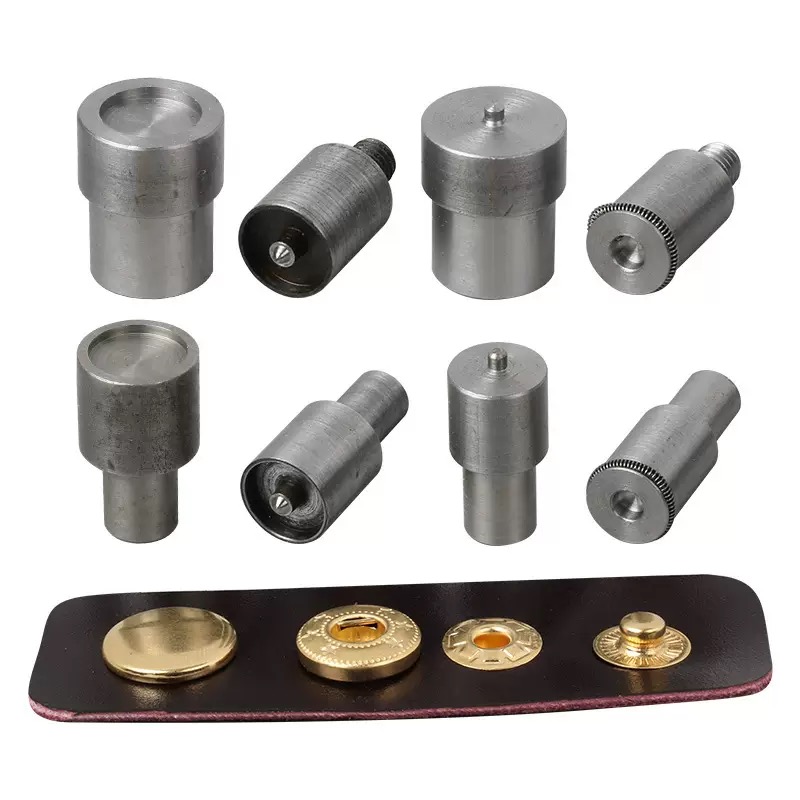
The basic idea behind no-sew button attachment
A no-sew button is usually not a single piece. It often includes two or more parts5 that lock together through pressure. One side is visible on the garment. The other side sits behind the fabric or inside the button structure.
Common structures include:
- Cap + socket
- Stud + post
- Button head + tack
- Prong button + washer
- Rivet button + backing
- Decorative logo button + fixing foot
The machine or hand press does not “glue” the button. It deforms, folds, clamps, or locks metal parts together6. This is why the correct die set matters so much. A die set supports the button shape during pressing. It also controls the angle, pressure, and final deformation.
Why brands and factories use no-sew buttons
I often explain this to buyers in simple terms: sewing is flexible, but mechanical attachment is more consistent for certain products. A machine-installed button can improve speed and reduce labor dependency.
No-sew attachment is widely used for:
- Denim jeans buttons
- Jackets and coats
- Workwear and uniforms
- Bags and luggage
- Sportswear drawcord parts
- Decorative metal logos
- Fashion trims and hardware accents
For example, a jeans button is normally attached with a tack. The tack pierces the denim from the back. The button head is placed on the front. A machine press then locks them together. No thread is required.
Sewing vs. no-sew button attachment
| Method | Main tool | Best for | Strength | Production speed | Buyer concern |
|---|---|---|---|---|---|
| Hand sewing | Needle and thread | Shirt buttons, repairs, soft garments | Medium | Slow | Thread quality and stitch security |
| Machine sewing | Button sewing machine | Mass garment production | Medium to high | Fast | Stitch consistency |
| Press attachment | Hand press or pneumatic press | Snaps, jeans buttons, rivets | High when matched correctly | Fast | Die set accuracy |
| Automatic machine | Feeding and attaching machine | High-volume factories | High and consistent | Very fast | Setup cost and maintenance |
Where mistakes usually happen
The main risk is not the no-sew concept itself. The risk is mismatch.
A factory may use:
- A button that is too large for the fabric
- A tack that is too short for thick denim
- A die set that does not match the button shape
- Excessive pressure that cracks paint or plating
- Low pressure that creates weak pull strength
- A sharp post that cuts fabric fibers
I once reviewed a sample where the button looked perfect from the front. However, the back tack had not rolled correctly inside the button. It passed a visual check but failed a pull test. That case reminded me that no-sew button attachment should always be checked by both appearance and mechanical strength.
> A button that looks attached is not always securely attached.
For procurement teams, the key point is simple. Ask your supplier to confirm the button structure, matching die set, recommended machine type, fabric thickness range, and test method before mass production.
Choosing the wrong no-sew button type can create more cost than the button itself. A design may look good on a sample, but it can fail during bulk production if the structure is not suitable for the fabric or end use.
You can attach several button types without sewing, including snap buttons, jeans buttons, rivet buttons, prong buttons, shank buttons with back parts, metal logo buttons, and decorative fasteners. Each type needs a compatible die set and installation method to create stable fixing strength.
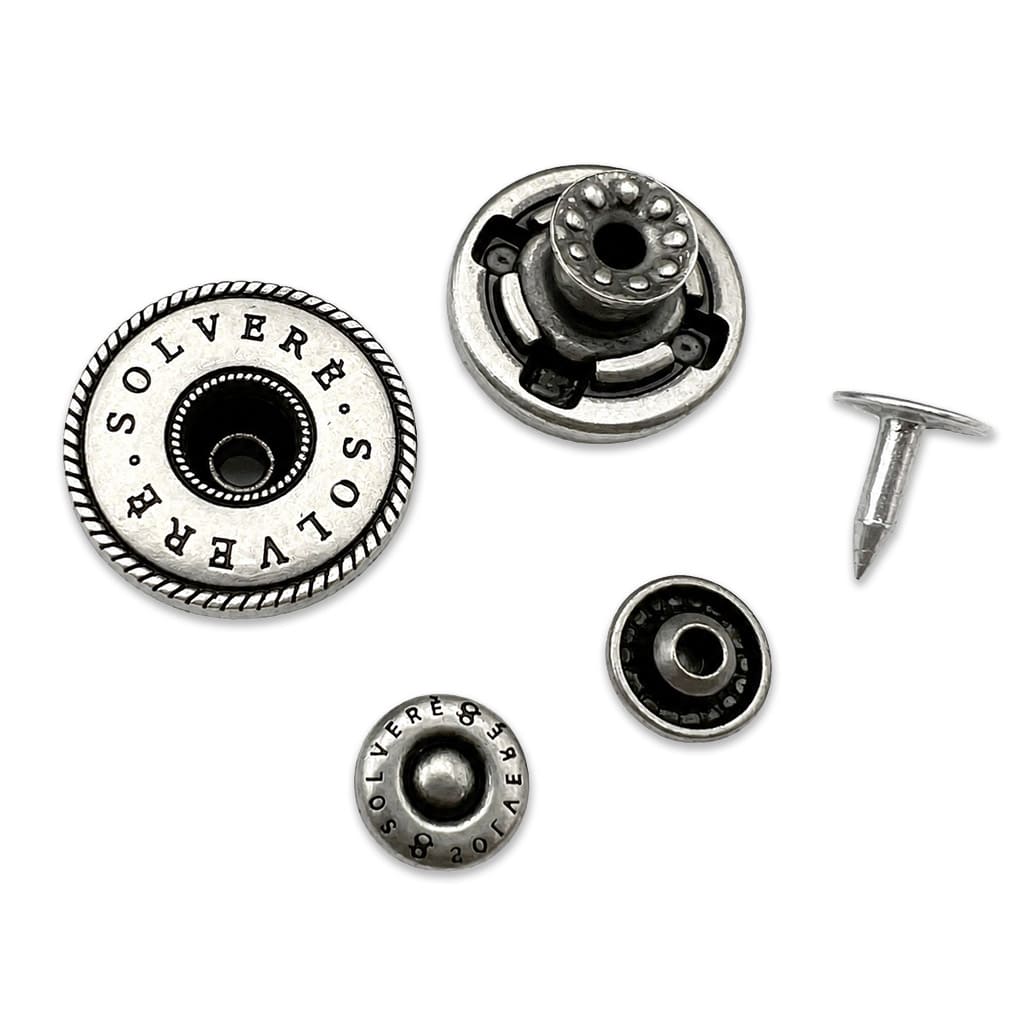
Common no-sew button types
Different button categories use different locking mechanisms. I usually ask buyers to send the garment material, button size, and application position before recommending a structure.
| Button type | Typical use | Attachment principle | Common equipment |
|---|---|---|---|
| Snap button | Jackets, babywear, bags | Cap, socket, stud, and post lock together | Hand press, pneumatic press |
| Jeans button | Denim jeans, jackets | Button head locks with tack | Button attaching machine |
| Rivet button | Bags, leather goods, workwear | Rivet post expands or rolls | Hand press, rivet machine |
| Prong button | Knitwear, decorative garments | Prongs fold into washer or fabric | Press with special die |
| Shank button with cap | Coats, fashion garments | Back part locks into shank or base | Press machine |
| Metal logo button | Bags, labels, brand trims | Feet, rivets, or prongs secure logo | Custom die set |
| Magnetic snap | Bags, wallets, closures | Prongs fold through washer | Hand press or manual setting |
Snap buttons
Snap buttons are popular because they provide both attachment and function. A snap system usually has four parts:
- Cap
- Socket
- Stud
- Post
The cap and socket form one side. The stud and post form the other side. When installed correctly, the two sides snap together and separate repeatedly.
Buyers should evaluate:
- Opening and closing force
- Plating resistance
- Cap surface condition
- Alignment after pressing
- Fabric reinforcement requirement
For lightweight fabric, reinforcement may be needed. For thick canvas or leather, the post length must be suitable. If the post is too short, the snap may fall off. If it is too long, the metal may deform poorly or feel bulky.
Jeans buttons
Jeans buttons are one of the best-known examples of how to attach a button without sewing. A jeans button usually includes a metal button head and a tack. The tack pierces the denim and locks into the button head.7
Important specifications include:
- Button diameter, such as 14 mm, 17 mm, or 20 mm
- Tack length
- Tack type, such as smooth, ring, or screw pattern
- Button material, such as brass, zinc alloy, or iron
- Finish, such as antique brass, nickel-free, gunmetal, or black nickel
For denim, fabric thickness can vary a lot after washing. Stone wash, enzyme wash, and garment dyeing may change fabric behavior.8 I recommend testing the button after washing, not only before washing.
Rivet buttons and decorative rivets
Rivet-style buttons are common in bags, jeans pockets, leather patches, and decorative panels. They can reinforce stress points and also create a branded look.
A rivet may look simple, but buyers should check:
- Post diameter
- Cap height
- Edge smoothness
- Back side flatness
- Pull-out resistance
- Corrosion resistance
For bags, the back side is important because it may touch lining, hands, or stored items. A rough back can damage fabric or cause complaints.
Metal logo buttons and custom hardware
Metal logo buttons are often developed for fashion brands. These may include engraved logos, embossed surfaces, enamel color, laser marking, or custom plating.
For custom pieces, the installation method should be designed early. A beautiful logo button can be difficult to attach if the back structure is ignored.
Common fixing designs include:
- One-piece shank
- Two-prong back
- Rivet back
- Screw back
- Snap back
- Hidden foot structure
As a manufacturer of garment and bag hardware, I always prefer to discuss the back structure at the design stage. It saves time during sampling and reduces changes later.
A good button can still fail if the machine setup is wrong. Many quality problems come from incorrect dies, unstable pressure, poor alignment, or using one die set for parts that look similar but are not actually the same.
Die sets and machines attach a button without sewing by placing button parts in aligned upper and lower dies, applying controlled pressure, and forming a mechanical lock through folding, riveting, clamping, or piercing. The die must match the exact button size, shape, and structure.
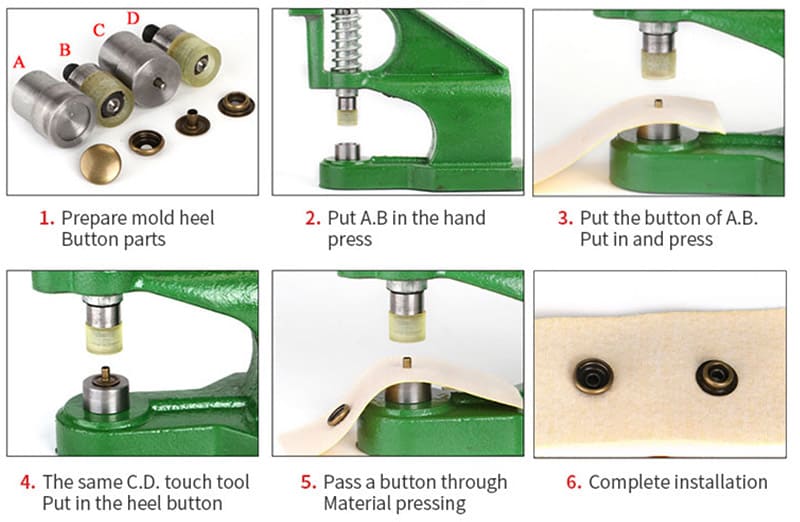
What is a die set?
A die set is a pair of tooling parts installed on a press machine. One die sits on the top. The other die sits on the bottom. Together, they hold the button components in the correct position during pressing.
A basic die set controls:
- Button center alignment
- Cap surface protection
- Post deformation
- Rivet rolling
- Pressure direction
- Final button height
If the die cavity is too shallow, the surface may be scratched or flattened. If the cavity is too deep, the button may not press tightly. If the post channel is wrong, the tack may bend.
Common equipment options
Different factories use different machines based on order volume and product type.
| Equipment type | Suitable for | Advantages | Limitations |
|---|---|---|---|
| Manual hand press | Samples, small batches, repairs | Low cost, flexible, easy to use | Slower, operator-dependent |
| Foot press | Small to medium production | Better leverage, simple operation | Less consistent than pneumatic |
| Pneumatic press | Bulk production | Stable pressure, faster output | Needs air compressor and setup |
| Hydraulic press | Heavy materials, strong parts | High force | Higher cost and slower changeover |
| Automatic button machine | High-volume garment lines | Fast, consistent, efficient | Requires investment and maintenance |
For small-batch orders and sample customization, a manual or pneumatic press is often enough. For mass production, an automatic attaching machine may reduce labor cost and improve consistency.
Step-by-step no-sew button attachment process
The actual method changes by button type, but the general workflow is similar.
-
Confirm button specification The buyer and supplier confirm button size, material, finish, structure, and application.
-
Check fabric or material thickness The factory measures the material after washing, coating, bonding, or lamination if applicable.
-
Select the correct back part The tack, post, washer, or socket must fit the total thickness.
-
Install the matching die set The operator confirms the upper and lower dies match the exact button model.
-
Set pressure and alignment The machine is adjusted to avoid loose attachment or surface damage.
-
Run trial samples The factory checks appearance, back side, function, and strength.
-
Perform quality tests Pull force, torque, snap force, and wash resistance may be tested.9
-
Approve production standard A sealed sample or control sample should be kept for bulk production comparison.
Pressure is not the only factor
Many people think stronger pressure means stronger attachment. That is not always true. Excess pressure can crack enamel, damage plating, cut fabric, or deform the cap. Too little pressure can cause looseness.
The best setup balances:
- Pressure
- Post length
- Material thickness
- Die shape
- Button material
- Fabric reinforcement
- Operator consistency
For example, a 17 mm jeans button on medium denim may need a different tack length than the same button on thick washed denim. The difference may look small, but it can change the final pull strength.
Why matched dies matter for procurement
From a buyer’s perspective, die sets should not be treated as an afterthought. If a supplier provides buttons but cannot provide or recommend the matching die, the factory may struggle during installation.
I recommend asking suppliers these questions:
- Do you provide matched die sets for this button?
- Can the die fit our current machine?
- What machine model or die thread standard is required?
- What fabric thickness range is suitable?
- What pressure setting do you recommend?
- Can you supply installation videos or sample testing guidance?
- Can you support replacement dies for future orders?
These questions are practical. They help prevent delays when bulk goods arrive at the sewing or assembly factory.
No-sew buttons look small, but they carry design, function, safety, and brand value. A weak button can cause returns. A rough edge can damage fabric. A wrong finish can fail a restricted substance test or conflict with brand requirements.
Key quality checks before bulk production
A good evaluation process should include visual, dimensional, mechanical, and chemical checks. The exact test plan should depend on the garment type, market, and brand standard.
| Evaluation item | What to check | Why it matters |
|---|---|---|
| Appearance | Scratches, dents, color difference, logo clarity | Protects brand presentation |
| Size | Diameter, height, post length | Ensures die and fabric compatibility |
| Function | Snap force, button rotation, closure behavior | Confirms daily use performance |
| Pull strength | Resistance to detachment | Reduces safety and return risk |
| Plating | Color, adhesion, corrosion resistance | Prevents rust and peeling |
| Edges | Burrs, sharp points, back side smoothness | Protects fabric and skin |
| Restricted substances | Lead, nickel release, cadmium, azo where relevant10 | Supports market compliance |
| Packaging | Separation, anti-scratch packing, labeling | Prevents transport damage |
Pull strength and performance testing
Pull testing is especially important for mechanical buttons. The required standard may vary by brand, product category, and market. Children’s wear often has stricter requirements than adult fashion garments.11 Workwear may need stronger fixing than decorative garments.
Common performance checks include:
- Pull-off test
- Snap open-close cycle test
- Salt spray test
- Washing test
- Dry cleaning test
- Color fastness check
- Torque or rotation check
- Needle detector compatibility when required
I avoid giving one universal pull-force value because professional standards and brand manuals differ. Instead, I suggest that buyers confirm the target requirement with their quality team, testing laboratory, or end customer. A qualified professional evaluation is best for application-specific decisions.
Material and finish selection
No-sew buttons can be made from brass, zinc alloy, iron, stainless steel, aluminum, or plastic-metal combinations. Each material has trade-offs.
| Material | Advantages | Possible concerns |
|---|---|---|
| [Brass | Good corrosion resistance, premium feel](https://en.wikipedia.org/wiki/Brass)%%%FOOTNOTE_REF_12%%% | Higher cost |
| Zinc alloy | Good for detailed logo shapes | Heavier, plating control matters |
| Iron | Cost-effective, strong | Rust prevention needed |
| Stainless steel | Strong corrosion resistance | Harder to process and higher cost |
| Aluminum | Lightweight | Softer, may deform under high pressure |
Surface finish also matters. Buyers may choose:
- Nickel
- Nickel-free plating
- Antique brass
- Antique copper
- Gunmetal
- Black nickel
- Matte black
- Gold
- Rose gold
- Painted enamel
- Laser logo
- Embossed or debossed logo
For export orders, buyers should ask whether the finish can meet their market requirements. Certifications and test reports should be treated as documents to verify. A supplier should be able to provide relevant reports when requested, but buyers should confirm whether the report covers the exact material, finish, and production batch.
Supplier selection checklist
When I support a buyer on garment hardware selection, I look beyond price. A lower unit cost may not save money if the factory needs extra time for installation or replacement.
A practical supplier checklist includes:
-
Product range The supplier should offer metal buttons, snaps, rivets, eyelets, buckles, hooks, rings, and related fittings if the project needs a coordinated hardware set.
-
Customization support The supplier should support logo development, mold making, sample production, plating options, and small-batch trials.
-
Die set support The supplier should provide matched dies or clear die specifications.
-
Sample lead time The supplier should give realistic sampling timelines for standard and custom items.
-
Quality control process The supplier should inspect incoming materials, production dimensions, surface finish, and final packaging.
-
Testing support The supplier should help coordinate pull tests, corrosion tests, and restricted substance tests when needed.
-
Communication ability The supplier should understand garment factory needs, bag manufacturing requirements, and brand development timelines.
-
Packaging and logistics Buttons should be packed to prevent scratches, mixing, and deformation during transport.
Why early supplier involvement helps
No-sew button attachment is easier when the hardware supplier joins early in development. At the sketch stage, a designer may focus on appearance. At the sample stage, the factory focuses on installation. At the bulk stage, the buyer focuses on consistency and delivery. A good supplier connects all three.
For example, if a fashion brand wants a custom metal logo button on a bag flap, the supplier can suggest whether a prong back, rivet back, or screw back is better. The answer depends on the bag material, lining access, logo size, and expected use.
Early discussion can reduce:
- Rejected samples
- Wrong die purchases
- Production delays
- Fabric damage
- Weak attachment
- Finish changes after approval
- Cost surprises
This is why I treat buttons as engineered trims, not only decorative parts.
A designer or sample maker may need a quick result before factory production. Hand sewing may not match the final bulk method, but a full automatic machine may not be available. This gap can create misleading samples.
You can attach a button without sewing in a sample room by using a manual hand press, pliers-type snap tool, hammer setting kit, or small pneumatic press. However, the sample should be tested carefully because manual installation may not match bulk production consistency.
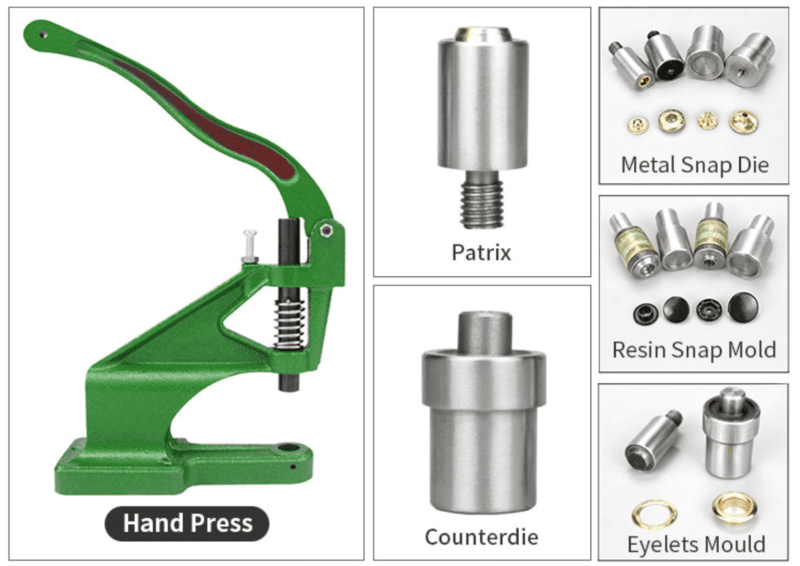
Practical tools for small-batch work
Small-batch orders and sample customization often need flexible tools. A manual press is useful because it can handle many button types by changing the die set.
Common sample-room tools include:
| Tool | Best use | Notes |
|---|---|---|
| Snap pliers | Light snaps and home repairs | Limited pressure and size range |
| Hammer setting kit | Occasional rivets or snaps | Higher risk of misalignment |
| Manual hand press | Samples and small batches | Good balance of cost and control |
| Pneumatic desktop press | Repeated sample production | Better consistency |
| Mini rivet machine | Bags and leather accessories | Useful for thicker materials |
Basic sample-room process
For sample work, I prefer a slow and controlled process.
- Mark the button position clearly.
- Test on waste fabric first.
- Confirm the post or tack length.
- Place the parts into the die correctly.
- Press once with stable force.
- Check front and back appearance.
- Pull lightly by hand before formal testing.
- Record the die and part combination.
A test on waste material is important. It helps catch fabric tearing, wrong post length, and plating damage before the real sample is used.
When home tools are not enough
Simple tools are fine for repair, mockups, or early prototypes. They are not always suitable for professional production approval. A hammer kit may install a snap, but it may not create the same pressure or deformation as a production press.
Buyers should be careful when approving a sample made with a different process than bulk production. If the sample was installed manually but bulk will use a pneumatic machine, the final result may differ.
Differences may appear in:
- Button tightness
- Back side shape
- Cap surface flatness
- Snap force
- Rotation resistance
- Fabric puckering
- Long-term durability
Best practice for sample approval
I suggest keeping two types of samples:
- Design sample: confirms size, color, logo, and position.
- Production sample: confirms real button parts, real die set, real machine method, and quality standard.
This approach helps avoid confusion. It also gives the garment factory a clear target.
If the order is small, a supplier that supports small-batch installation guidance can be helpful. If the order is large, the buyer should confirm whether the factory has the right machine and die sets before ordering bulk buttons.
Frequently Asked Questions
Can I attach any button without sewing?
No. Standard shirt buttons with holes are designed for thread attachment. You can only attach a button without sewing if the button structure supports mechanical fixing, such as snaps, jeans buttons, rivets, prong buttons, or special shank buttons with matching back parts.
Do I need a special die set for every button?
In most professional cases, yes. Similar buttons may still need different die sets because small changes in diameter, cap curve, post length, or back structure affect pressing. A matched die set helps protect the surface and creates a secure mechanical lock.
Is a no-sew button stronger than a sewn button?
A no-sew button can be stronger for denim, bags, workwear, and heavy fabrics when the parts, die set, and machine are correctly matched. However, strength depends on material thickness, reinforcement, pressure, and testing. Buyers should confirm performance with pull testing.
Can no-sew buttons be customized with a logo?
Yes. Metal logo buttons, jeans buttons, snaps, rivets, and decorative hardware can often be customized with embossing, engraving, enamel, laser marking, or special plating. The back structure should be designed together with the front logo to ensure easy installation.
What should I ask a supplier before ordering no-sew buttons?
You should ask about button material, finish, size, back structure, fabric thickness range, matching die sets, machine compatibility, sample lead time, quality control process, and available test reports. You should also verify certificates and confirm whether they apply to your exact product.
Conclusion
To attach a button without sewing, you need more than a clever tool. You need the right button type, matched die set, suitable machine, correct pressure, and practical quality checks. Snap buttons, jeans buttons, rivets, prong buttons, and custom metal logo buttons can all work well when they match the fabric and application. If you are developing garment or bag hardware, I can help with button selection, custom samples, small-batch orders, and production-ready die set guidance.
"Snap fastener", https://en.wikipedia.org/wiki/Snap_fastener. An encyclopedia source on snap fasteners and rivets supports the classification of these components as mechanical fastening devices used to secure materials without thread-based stitching. Evidence role: definition; source type: encyclopedia. Supports: A neutral source should define snap fasteners, rivets, and related hardware as mechanical fastening systems used to join or secure materials without stitching.. Scope note: This would support the general fastening category rather than every specific button construction described in the article. ↩
"Fasteners Made Easy - BE BOLD. Shape the Future.", https://pubs.nmsu.edu/_c/C232/index.html. A textile-manufacturing source describes press equipment and die tooling as standard means for installing snap fasteners, rivets, and related garment hardware, supporting the article’s description of non-sewn installation methods. Evidence role: general_support; source type: education. Supports: A textile or manufacturing education source should describe presses, dies, or automatic machines as standard tools for installing snap fasteners, rivets, or buttons in apparel production.. Scope note: The source may describe machinery categories generally rather than the exact machine models used by a particular factory. ↩
"Fasteners Made Easy - BE BOLD. Shape the Future.", https://pubs.nmsu.edu/_c/C232/index.html. Textile-manufacturing literature identifies snaps, rivets, and metal buttons as apparel and accessory trims, providing contextual support for their use in garment, denim, and bag production. Evidence role: general_support; source type: education. Supports: A textile or apparel-manufacturing source should show that metal trims such as snaps, rivets, and jeans buttons are used across garments, denim items, bags, and accessories.. Scope note: The source would establish industry context, not quantify how common the practice is in every product category. ↩
"Friction-Stir Riveting", https://www.utoledo.edu/engineering/mechanical-industrial-manufacturing-engineering/pdfs/Friction-Stir%20Riveting%20an%20Innovative%20Process%20for%20Joining%20Difficult-to-Weld%20Materials.pdf. Mechanical-joining references describe fastening by deformation, interlocking, clamping, and riveting, supporting the article’s explanation that no-sew buttons rely on mechanical engagement rather than thread. Evidence role: mechanism; source type: education. Supports: A manufacturing or mechanical-engineering source should explain that mechanical fasteners join materials through deformation, interlocking, clamping, or riveting rather than adhesive or stitching.. Scope note: The source would support the underlying joining mechanism and may not address garment buttons exclusively. ↩
"Usator:Melv douc/dictionario anglese-interlingua S-Z", https://ia.wikipedia.org/wiki/Usator:Melv_douc/dictionario_anglese-interlingua_S-Z. A reference source on snap fasteners describes them as multi-component closures, supporting the article’s statement that many no-sew button systems use two or more parts that engage mechanically. Evidence role: definition; source type: encyclopedia. Supports: A neutral source should identify snap fasteners and similar garment fasteners as multi-part systems with components that engage or lock together.. Scope note: This directly supports snap systems but only contextualizes other fasteners such as rivet buttons and decorative logo hardware. ↩
"Riveting Technology Enables Lightweight Magnesium ...", https://www.pnnl.gov/news-media/riveting-technology-enables-lightweight-magnesium-fasteners-fuel-efficiency. Manufacturing references on riveting explain that a rivet or post is plastically deformed to create a mechanical joint, supporting the article’s description of pressed metal parts being deformed or locked rather than glued. Evidence role: mechanism; source type: education. Supports: A technical source should explain that riveting and related press-fastening processes use plastic deformation or mechanical interlock to secure parts.. Scope note: The source supports the fastening principle generally and may not describe every apparel-specific die-set geometry. ↩
"Denim Accessories: Jean Buttons, Rivets & More", https://www.atabuttons.com/blog/denim-accessories-jean-buttons-rivets-eyelets-snaps. A garment-construction source describing jeans buttons as a button head joined to a tack through the denim supports the article’s account of the tack piercing the fabric and locking into the head. Evidence role: mechanism; source type: other. Supports: A neutral textile or product-construction source should describe jeans buttons as consisting of a button head and tack that are pressed together through denim.. Scope note: Many publicly available descriptions are instructional rather than peer-reviewed; the citation should be selected for neutrality and technical clarity. ↩
"Advancements in Sustainable Natural Dyes for Textile ... - PMC", https://pmc.ncbi.nlm.nih.gov/articles/PMC10458907/. Textile research on denim finishing reports that stone washing, enzyme washing, and related wet processes can alter fabric properties, supporting the article’s caution that button testing should consider post-wash fabric behavior. Evidence role: mechanism; source type: paper. Supports: A textile research paper should show that washing or finishing processes can alter denim or garment fabric properties such as thickness, strength, hand feel, or dimensional stability.. Scope note: The source would support changes in fabric properties generally and may not test button pull strength directly. ↩
"What Is Button Pull Test in Textile - Gester Instruments", https://www.gester-ppetesting.com/what-is-button-pull-test-in-textile.html. Testing standards and laboratory methods for garment fasteners include evaluations of attachment strength, functional force, rotational security, and laundering durability, supporting the article’s list of relevant performance checks. Evidence role: expert_consensus; source type: institution. Supports: A standards body or testing institution should document recognized methods for evaluating fastener attachment strength, snap operation, torque, or laundering durability.. Scope note: Applicable test methods vary by product type, market, and buyer specification. ↩
"Application of systematic evidence mapping to identify ... - PMC", https://pmc.ncbi.nlm.nih.gov/articles/PMC11927098/. Regulatory sources such as REACH and consumer product safety rules restrict substances including nickel release, cadmium, lead, and certain azo colorants in relevant consumer products, supporting the article’s inclusion of these items in restricted-substance checks. Evidence role: expert_consensus; source type: government. Supports: A government or international regulatory source should document restrictions on lead, cadmium, nickel release, and azo dyes in consumer goods, textiles, or accessories.. Scope note: Regulatory applicability depends on market, material, user age group, and whether the button or finish falls within the scope of the rule. ↩
"Session 4 Textiles En", https://www.cpsc.gov/s3fs-public/Session%204%20Textiles%20En.pdf. Consumer product safety regulations for children’s products address small parts and choking hazards, supporting the article’s statement that children’s wear can require stricter fastener performance controls than adult fashion items. Evidence role: expert_consensus; source type: government. Supports: A consumer safety authority should show that children’s products are subject to small-parts, choking-hazard, or attachment-security requirements not generally applied to adult fashion garments.. Scope note: The exact requirement depends on jurisdiction, child age range, and product classification. ↩
"Brass", https://en.wikipedia.org/wiki/Brass. Materials references describe brass as a copper alloy with generally good corrosion resistance, supporting the article’s characterization of brass as a suitable corrosion-resistant option for garment hardware. Evidence role: general_support; source type: encyclopedia. Supports: A materials reference should describe brass as a copper alloy with generally good corrosion resistance in many environments.. Scope note: Corrosion performance varies with alloy composition, plating, sweat exposure, washing chemistry, and storage conditions. ↩